By: Mike Mena, Ph.D. Candidate
If you are wondering how to make your video recordings, PowerPoint voice-overs and/or remote lectures more compelling, the first thing to upgrade is your microphone! There are hundreds of microphones to choose from—from budget to expensive, simple to complex, beginner to professional, and the list goes on. However, how we actually use the microphone in all these scenarios is always the same. What follows is a simple technique to get the best possible audio quality out of any microphone, including the one you might already own.
How to use an external microphone?
There is one common mistake most of us make when we use our microphone for the first time: we are too far away from it. Most external USB microphones come with a desktop stand—which is amazingly convenient! But, to get the most out of any microphone, there is one technique that is crucial to getting that “radio announcer” voice, and, it’s pretty simple:
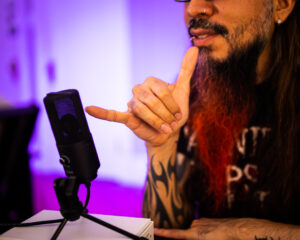
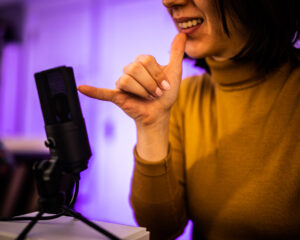
Position your mouth about 8-12 inches away from the front of the microphone.
But, who has time to bring out a measuring tape? I suggest using the “surfer hang loose” hand sign. It starts with making the “hang loose” gesture. Like this:
THE “HANG LOOSE” HAND GESTURE
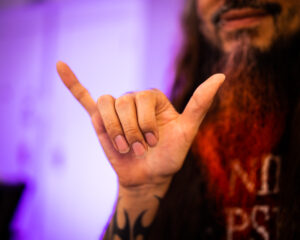
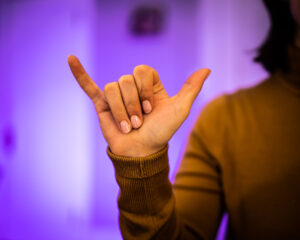
Whether you have big hands or small hands, this is about 8-12 inches from tip-to-tip. The “hang loose” measurement is a quick way to estimate how far your mouth should be from the microphone.
The idea is not to be too close or too far from your microphone!
THE “HANG LOOSE” MEASUREMENT IN ACTION
If the microphone is too low when it is sitting on your desk, you can try putting a stack of books underneath it to prop it up much closer to your mouth.
Like any piece of audio equipment, it takes a bit of practice to get the most out of it. Your first recording may not be amazing: you may speak too loud at times, you may speak too softly at times. But, learning how to control the volume of your voice is quite simple—it just takes a little bit of practice.
Upgrading your microphone in combination with the “hang loose” measurement is the first step to creating better quality videos and voice-overs for your students.


A good microphone really makes a lot of difference for the listener. I loved the way this article has explained how far the mouth should be from the microphone by giving the image references.