This page was remixed from the Teaching with Zoom Guide developed by the Baruch College Center for Teaching and Learning.
By Fall 2020 CUNY may be providing access to Zoom video conferencing platform to all faculty and students. Faculty may also choose to use Skype, Blackboard Collaborate, or the open source alternative, Jitsi. What follows are suggestions for using video conferencing effectively in your course.
Pre-record lectures & use synchronous sessions to foster discussion
- Pair lecture videos with readings and other course materials to be reviewed by students prior to the synchronous class session.
- Create short, 5-10 minute lecture videos. Shorter videos will be easier to produce and revise, and are more likely to hold students’ attention. You may need to make 2-3 videos to work through content for a class session, but by keeping them short, these can be revised and re-used in later semesters.
- End lecture videos with a question or prompt. Welcome student responses in writing, or in class.
Maintain instructional flow
- There are several settings for viewing meeting attendees, and similar functionality in other software. The Gallery View allows all attendees to see up to 49 attendees per page at once, whereas the Speaker View highlights the attendee who is speaking, and places all other attendees in smaller boxes on the top or side of the window. Typically, Gallery view is best for class and discussion settings.
- Ask and remind students to post questions or comments to the “Chat” while someone else is already speaking, then have time/pauses allocated for responding to the Chat. You can ask a student to facilitate the chat by monitoring the chat space and posing questions that arise there. You can also encourage students to direct message one another using the chat functionality.
- Students can use the “Raise Hand” function when they want to speak, and then lower after they’ve done so.
- The “Screen Share” function can show students content on your screen, including presentations and media. You can screen share your slides to make sure discussion questions are visible to all students. Attendees can also be given the ability to “annotate” your screen while you’re sharing it, and contribute to a shared “White Board.”
Use Breakout Rooms to engage students in small group conversations
- Breakout rooms allow attendees to meet in smaller groups within the larger synchronous discussion. See here for more information on enabling Breakout Rooms and setting up breakout rooms.
- Breakout rooms create a space to work through ideas and questions in detail before engaging in a larger group discussion.
- Small groups can discuss and apply a particular concept, focus on a specific section of text, or craft questions to pose to the group, and then “share back” with the whole group to jump start a larger discussion.
- Provide summaries for students who could not attend the synchronous session
- Synchronous sessions can be recorded but it is recommended that you ask for and gain student permission to record the session. If you record the synchronous session, you can store the video in Dropbox, post the video on Blackboard. or share via course platforms. Meeting hosts have the option to record sessions to their local computer or to store in the cloud; be aware that videos stored in the cloud will only be maintained for a limited amount of time.
- Chat transcripts can be saved before the end of each class session to preserve the notes, questions, and ideas shared in the chat.
- Outside of the chat,students might benefit from using a collaborative writing platform, such as Google Docs or Padlet, to take shared notes during the synchronous class session. This allows students to see how others are interpreting and understanding course topics, and creates a valuable record of class conversations.
Make your Synchronous session accessible
- Enable live captioning for your synchronous session using Rev, powerpoint, or a built in captioning tool.
- For students who are blind or have low visibility, narrate the material that you’re displaying visually on the screen. Just as you might read materials aloud in class, read screen material that you share on-screen just in case students are not able to see essential text.
Use Polls
- Polls may be set up prior to the class meeting, or created on the fly. Once students have responded to the polls, the results can be announced and discussed, or if the poll is open ended you could ask students to clarify or contextualise their responses.
- Polls can be useful for assigning students to smaller discussion groups, and for real-time, non-verbal input on topics under consideration.
- For more information about using polls to promote discussion see Using Online Polls to Promote Active Learning and Student Engagement.
User Management
- There are several ways to invite participants to a scheduled or instant meeting. See here for more information about inviting folks to join a Zoom meeting.
- Allow the host to put attendees on hold. This gives you the option of temporarily kicking out an uninvited or disruptive, unknown, or unruly participant.
- Disable desktop/screen share for users on. This ensures that participants will choose a particular application to share, and they won’t accidentally share their whole computer screen, including personal data or information on their desktop.
Protecting Student Privacy
- Allow attendees to mute and disable their camera. Although you may want students to turn their cameras on (and you can encourage this), students should have the option to turn their camera off and mute themselves for privacy reasons.
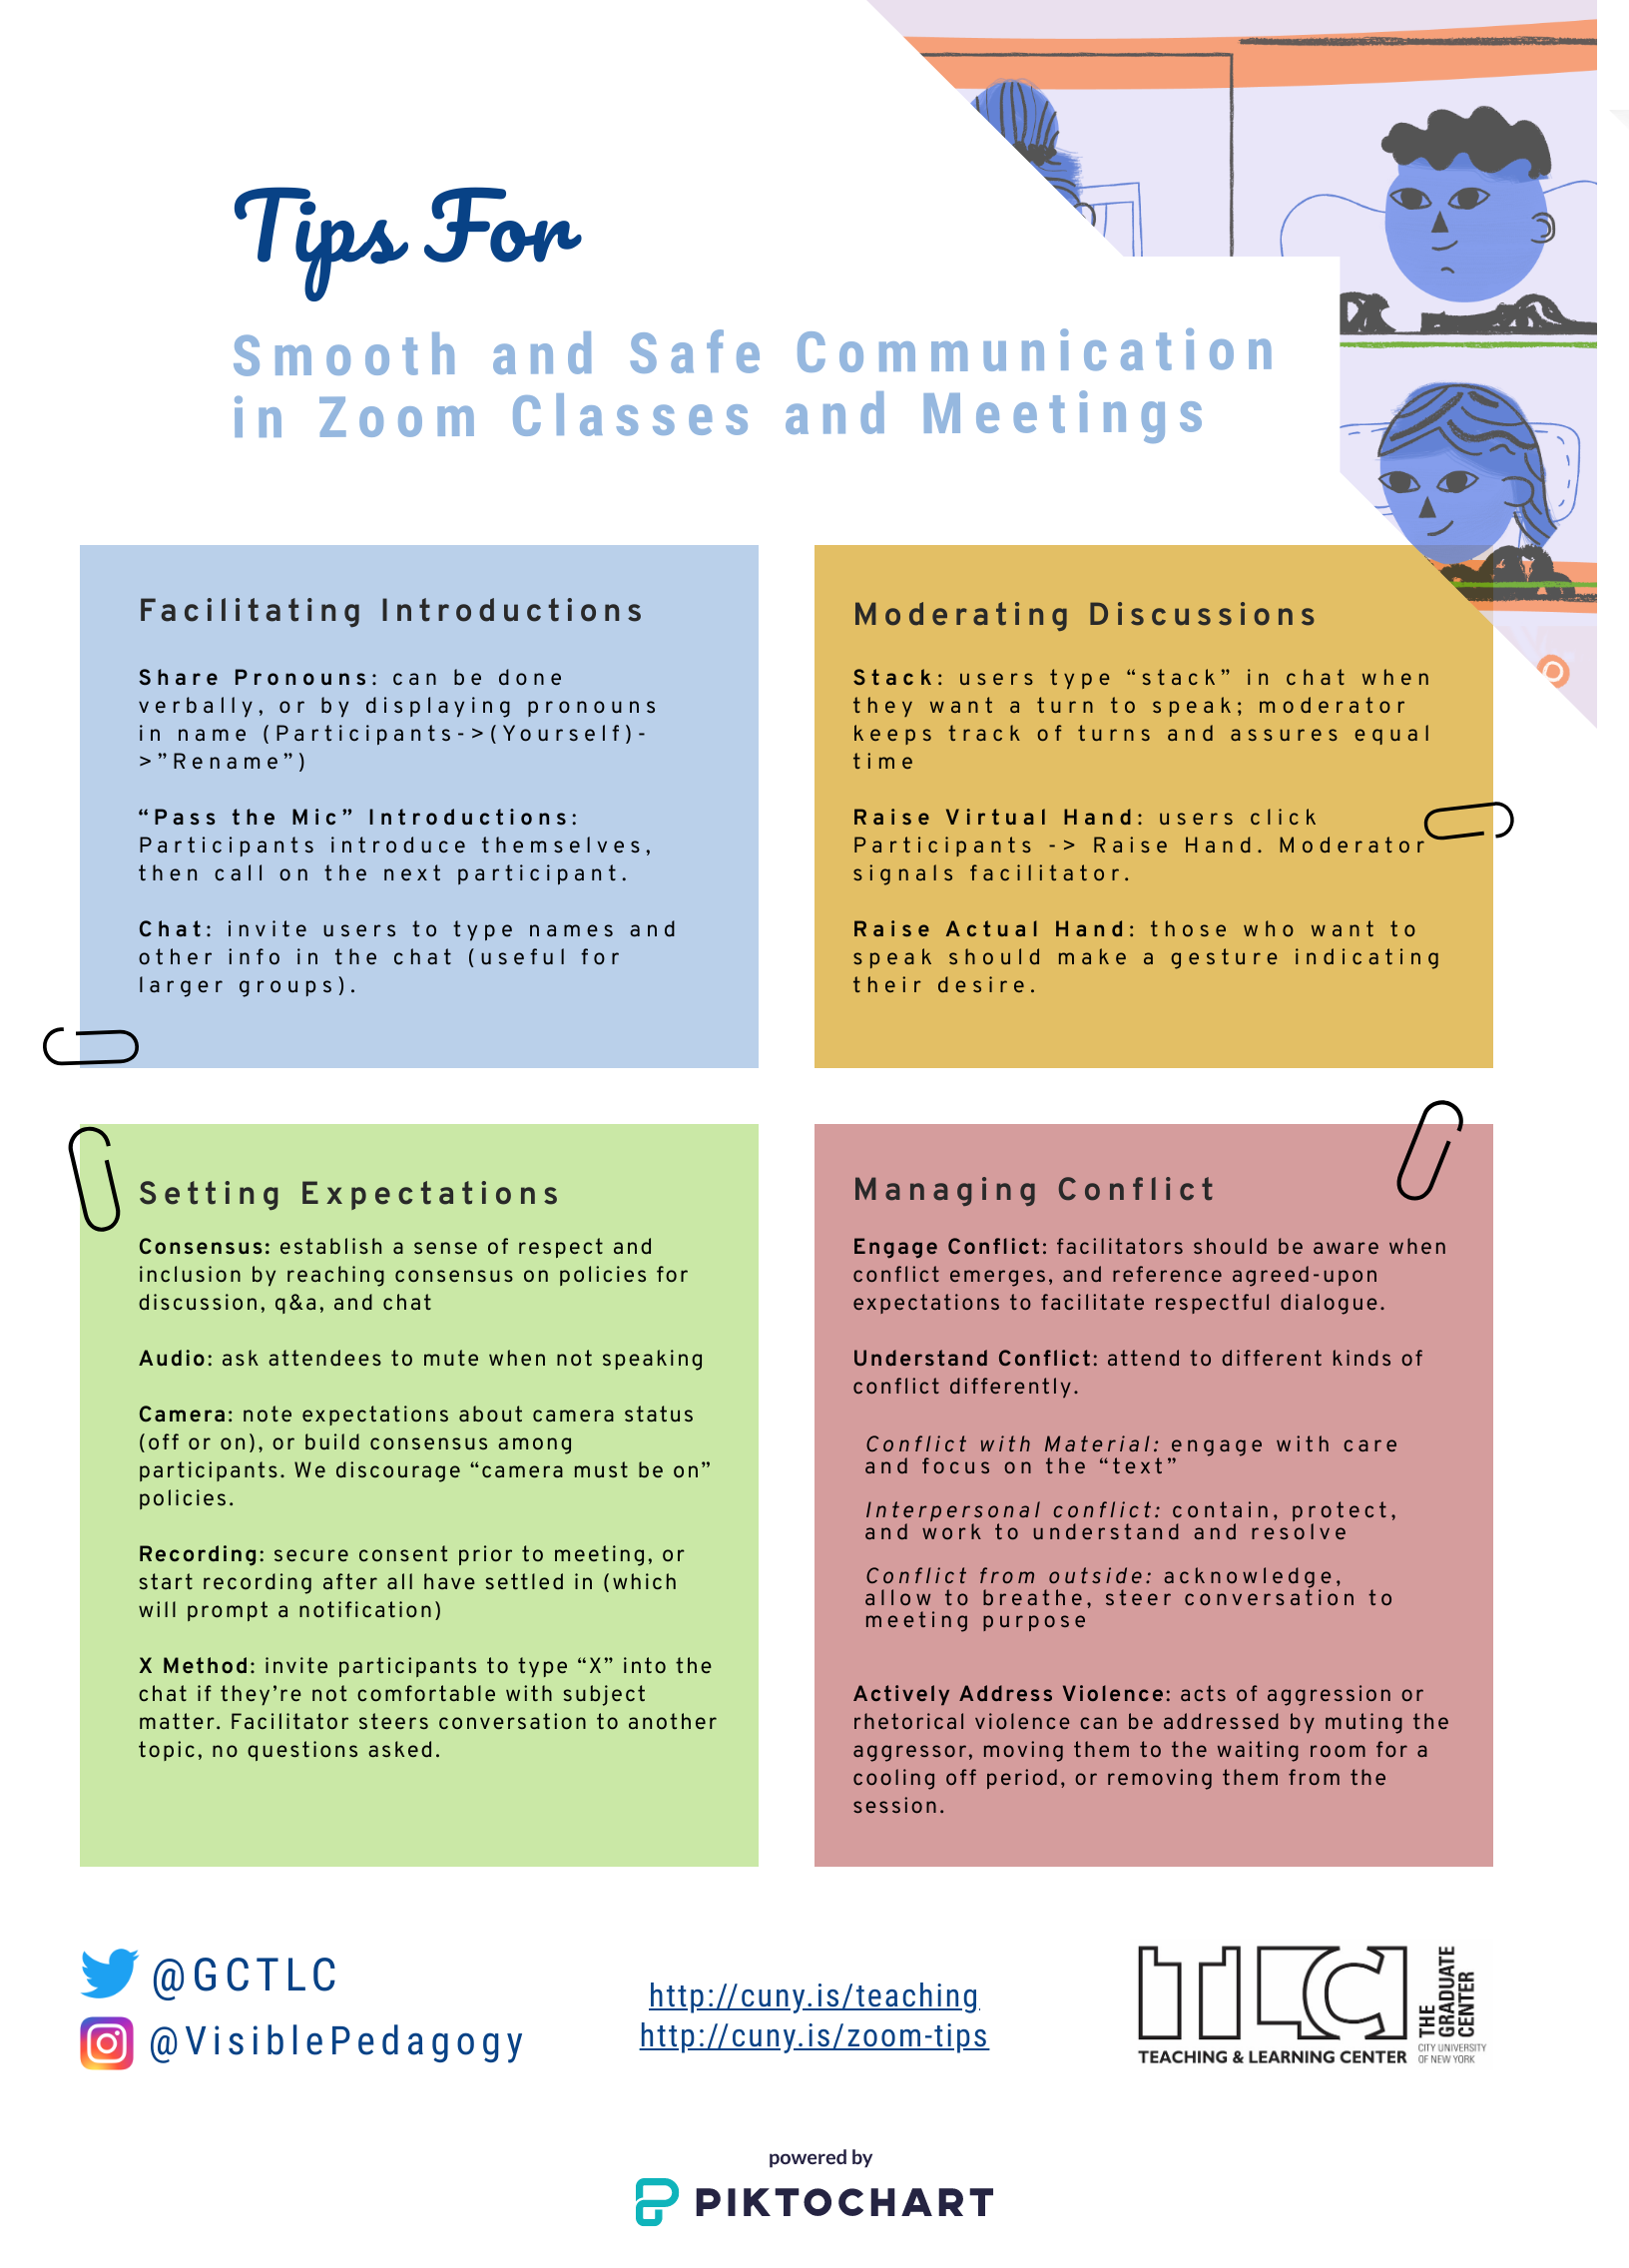
Downloadable “Tips for Smooth and Safe Communication in Zoom Classes and Meetings”
To engage in further discussion or ask questions, join the GC Online Commons Group here.