Obtain a CUNY Zoom Account
All CUNY faculty and staff are able to claim a CUNY zoom account using their CUNYFirst credientials.
Visit the CUNY Zoom page for more information.
To claim you CUNY Zoom Account visit https://cuny.zoom.us and sign in using your CUNYFirst credentials.
It is not necessary to have a Zoom account in order to join and participate in meetings. An account is only needed if you wish to host your own meetings.
Download the Zoom Client for your Computer or Device
You will need to have Zoom installed on the computer or tablet you will use to attend and host meetings.
Download the Zoom Client for your computer here. If you are using a tablet or phone, search and download Zoom from your preferred app store.
Sign into your Zoom Account
To schedule meetings, visit https://cuny.zoom.us and sign in using your CUNYFirst credentials.
Once you are signed in, click “My Account” in the upper right corner to schedule meetings and change your settings.
Schedule a Zoom Meeting
Once you have accessed your account:
- Click Meetings in the menu on the left.
- Click Schedule a Meeting.
- Choose the date and time for your meeting.
- If this will be a recurring meeting, check the box to indicate recurrence and designate the meeting date/time schedule. The Zoom meeting information (link and meeting ID) will be the same for every recurring meeting.
- Select any other settings you would like to use (see below).
- Click Save.
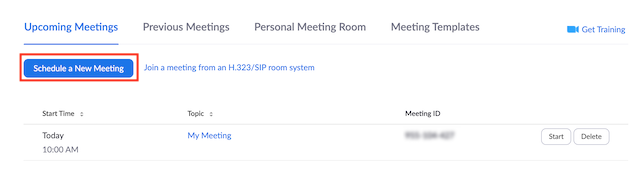
All scheduled Zoom meetings will be visible on the “Meetings” page of your account. You can start the meeting by visiting this page, or by clicking the shared meeting link while signed into your account.
Suggested Settings for a Zoom Meeting
- Make sure “Waiting Room” is unchecked. This allows students to come in and out of meeting as needed.
- If you have a waiting room, you will need to monitor the waiting room and allow students to come into the meeting.
- For added security, you can set up a Meeting Passcode to enter the meeting. However, if you have a waiting room and monitor who is entering and/or if the meeting link will not be shared publicly, you likely do not need a passcode.
- Check to allow participants to join before you do. This is helpful in case you are running late, or if students want to join the class meeting a bit early.
- Check to automatically mute participants when they enter.
- Don’t set the room to auto-record. If you want to record the session, obtain consent from everyone who will be in the Zoom meeting.
Invite Students to a Zoom Meeting
Once you have scheduled a meeting you will be taken to the Meeting information page. This page can also be reached by clicking the “Topic” link in the scheduled meeting list.
In the meeting information page, you will see an option to “Copy Meeting Invitation”. Clicking this option will create a pop-up with information to copy and share with students. This information can be emailed or posted on your course site. If your course site is public, this information should be emailed or shared in a private space only accessible to your students.
Once the Meeting is Scheduled
Be sure to send the meeting information to attendees prior to the meeting date/time. See above.
You can begin the meeting by:
- Going to your account page, visiting the “meetings” page, and clicking “Start” or,
- Making sure you are signed into your account, and clicking the link you shared with students.
When you are in the meeting:
- Make sure your camera and microphone are on when you are talking.
- Monitor the waiting room to let students and meeting participants into the meeting.
- View participants by clicking the “Participants” button at the bottom of your Zoom client.
- Make sure students’ names appear on the Zoom sign-in. This name appears in the video, participant list, and the chat. Students can Rename themselves in the video by hovering the cursor over their image/space and selecting “Rename.”
- Ask students to mute themselves and unmute when they want to speak. As the host you can mute students who do not mute themselves. This is especially helpful if a student’s location is creating distracting background audio.
- If the internet connection for the entire class is faltering, ask everyone to turn off their video. This will reduce the amount of bandwidth required for the session to run.
Once you are up and running with Zoom, check out these other Quick Guides
This Quick Guide was created with remixed information from the following sources:
- Teaching with Zoom @ Baruch College, created by the Baruch College Center for Teaching and Learning
- Quick start guide for new users, created by Zoom